2015 January 1
Solar Observing
Solar observing is something that can really ‘get’ you once you get started. The Sun is constantly on the change, not only day by day but sometimes hour by hour and even minute by minute when at its spectacular best.

First a warning; one you have no doubt heard many times before but it is always worth remembering before each observing session. The Sun is a dangerous object to observe. Do not look at the Sun directly either through a telescope or with the unprotected naked eye. Any mistake can result in serious damage to your eyesight so do not take any chances and always think about what you are doing.

To find the Sun initially, leave the dust cap on the telescope and point the scope at the Sun. Then hold a piece of white card behind the eyepiece of the telescope and then move the telescope around a little until the shadow of the telescope is small and rounded on the piece of card. Then remove the dust cap and the solar image can usually be seen projected onto the white card held directly behind the scope and you will notice the bright circular image of the Sun in eyepiece. This is the time for caution and to get the solar filter into place quickly. Place the solar filter over the object end of the telescope before looking through the eyepiece. Only when satisfied that it is absolutely safe should you look through the eyepiece and view the solar image directly. Now the work to chart the Sunspots begins.
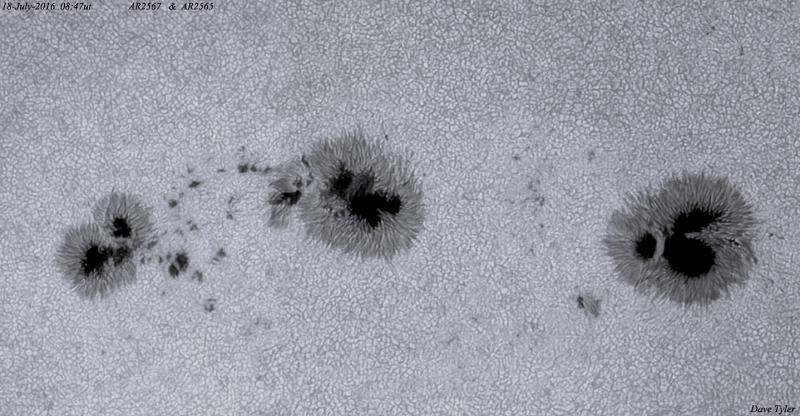
Draw a 6 inch (153 mm) circle on some plain paper and draw in the groups and the detail of the spots as they appear on the Sun. Remember your telescope will invert the image so south is top. Once you have accurately charted the groups, count the groups and then all the spots within them. If groups are more than 10 degrees apart on the solar surface then they are counted as individual groups. Let us say that you count 3 groups consisting of 3 spots in the first group, 8 spots in the second group and 1 spot in the third group. You now have 3 groups, and 12 spots. To record the sunspot number for the day you need to multiply the number of groups by a factor of ten, i.e. 30 and add it to the number of spots recorded i.e. 12 and you get a total of 42 which is the sunspot number referred to as ‘R’. This is a simple sunspot count and can be achieved daily in minutes.
Lyn Smith
Lyn Smith is the BAA Solar Section Director and can be contacted by selecting Here.
The solar observations which BAA members have uploaded to their Member pages can be found here.
https://britastro.org/wp-content/uploads/2015/01/Diagram120421ML0021.JPG
| The British Astronomical Association supports amateur astronomers around the UK and the rest of the world. Find out more about the BAA or join us. |
