2016 March 27
Observing the Transit of Mercury, 2016 May 9
This document is also available in PDF format.
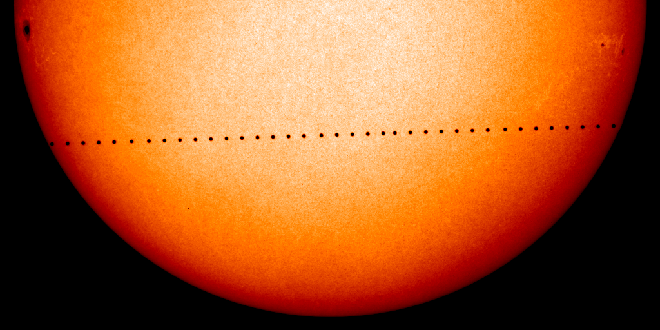
This will be the first transit of the planet since 2006 November, and the first since 2003 May to be visible from Europe. The 2006 event was unobservable from the UK as it occurred during night time.
This time around, the transit will be visible in its entirety from these shores, and also favourably placed for observation from Europe, Africa, the Americas, and western Asia.
Planetary alignment
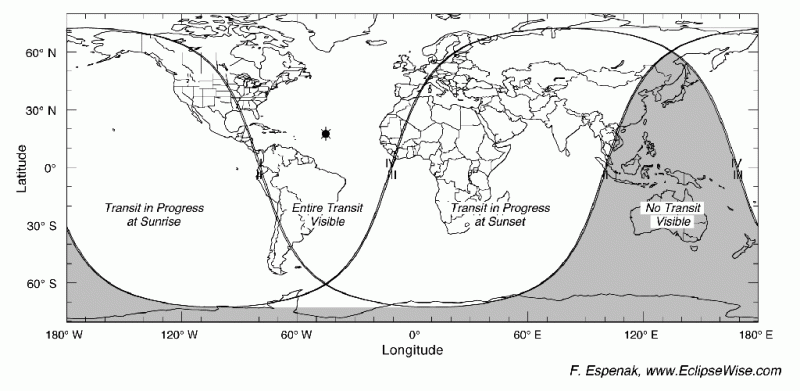
Mercury only transits in front of the Sun’s disk when one of these inferior conjunctions coincides with the planet passing through the Earth-Sun plane, which it does on average once every 44 days. These two cycles coincide on average only once every 7-8 years. Each time, a transit can be seen from any location where the Sun is above the horizon at the time.
A small black dot
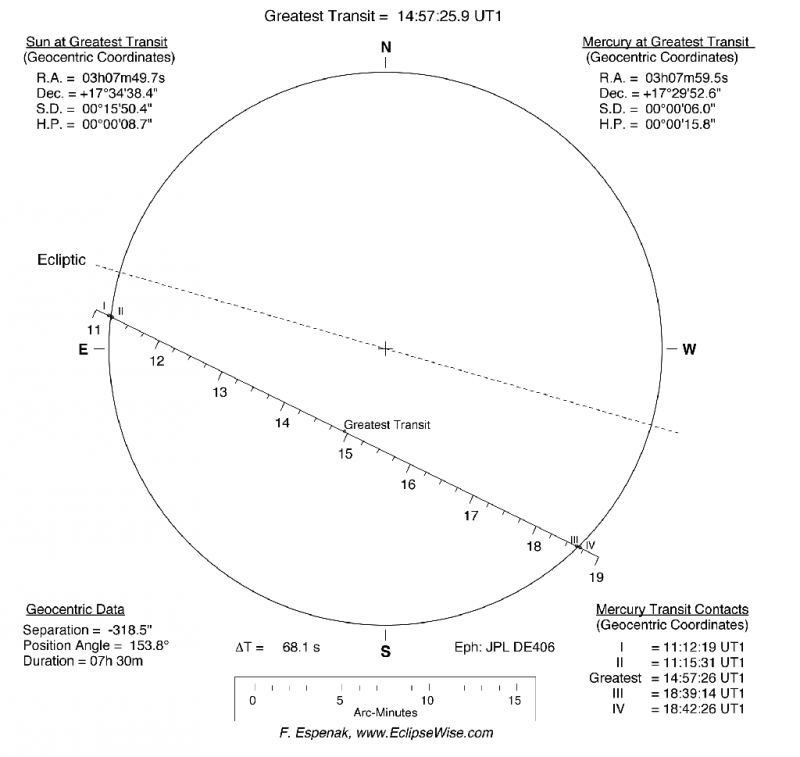
This makes transits of Mercury significantly trickier to observe than other solar phenomena such as eclipses and even transits of Venus. Mercury’s silhouette is not visible without some form of magnification. For example, the BAA Solar Viewers which we have recommended for viewing eclipses in the past do not provide any magnification. They will not allow you to see this year’s transit.
As a result, it is especially important to emphasise that the Sun is a dangerous object to observe. Viewing it through any optical instrument – even a pair of binoculars or the finderscope on the side of your telescope – can cause instant and permanent blindness.
The aim of this guide is to give you some ideas how to observe the transit safely.
Group observing
If you have any doubts about what equipment to use, by far the safest thing to do is to go along to a public observing event. We expect many astronomical societies across the country to be hosting observing events on the day, and they’ll be sure to welcome newcomers. You may meet some new people at the same time as seeing the transit.
Some university astronomy departments may also be hosting public observing events.
Projecting an image of the Sun
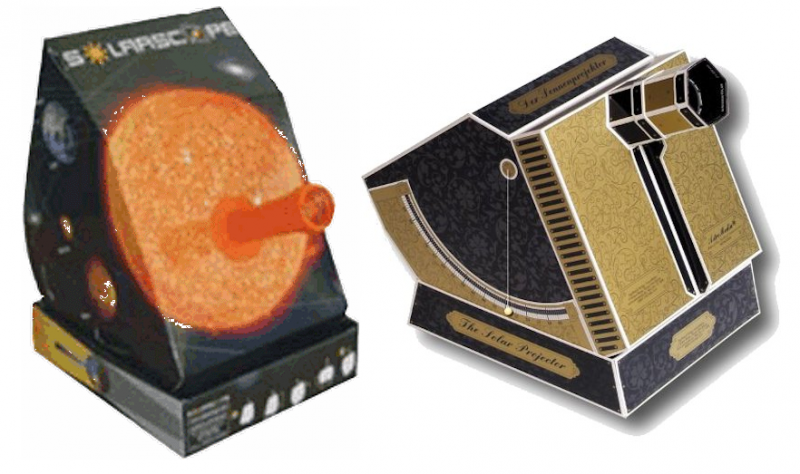
These typically consist of a cardboard box with a small lens on one side. They project an enlarged image of the Sun onto a white cardboard sheet inside the box. Once the transit is over, they’re also great for observing sunspots. They are safe to use, quick to set up, and ideal for use with children and groups
To my knowledge, the only UK supplier who sells these is Green Witch. They sell a Sun Projector Kit for £18, or a sturdier Lightec Solar Projection Telescope for £50. I gather these items are already selling very quickly, so if you plan to use one it would be worth ordering early.
Using a telescope to project an image
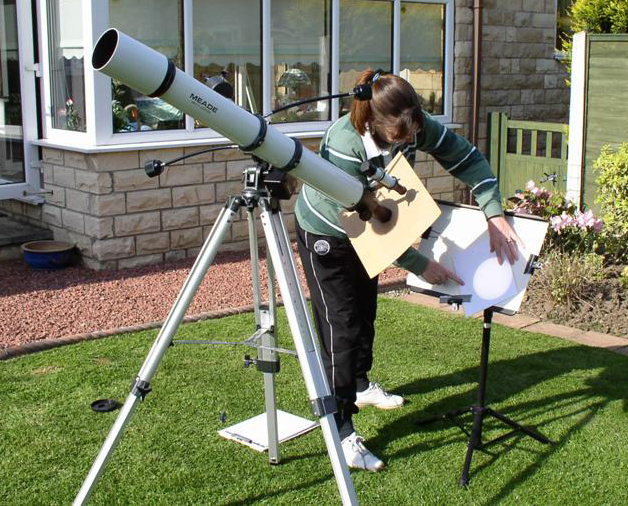
If you have a refractor or small Newtonian telescope, you can quite easily project an image of the Sun onto a piece of white card. You should not attempt to do this with a Schmidt-Cassegrain (SCT) or Maksutov telescope, as you may permanently damage your telescope. If you are unsure what kind of telescope you have, check first. Many telescopes sold to beginners are of the Schmidt-Cassegrain design.
Setting up the equipment
To project an image of the Sun, you simply need to fit a cheap low-power eyepiece into your telescope and hold a piece of card 30-40 centimetres away from it.
Avoid using expensive eyepieces when doing this, as there is always a risk that the eyepiece will crack under the Sun’s heat. Such damage will not be covered under any guarantee, and may cost you a great deal of money. You should also avoid eyepieces made from plastic, as they are liable to melt.
Aiming your telescope at the Sun can be a challenge at first. You must not use a finderscope, as looking at the Sun through this is just as dangerous as with any other optical instrument. Sighting the Sun along the edge of the tube must also be avoided, since your eyes can be damaged by looking directly at the Sun even without magnification.
The best way to aim the telescope is to look at the shadow of your telescope tube on the ground. When the telescope is pointing to one side of the Sun, the shadow will appear as an elongated oval. If you move the telescope into better alignment with the Sun, its shadow will get smaller and become more circular.
Once you have oriented the telescope to make the shadow as small and circular as possible, it should be pointing in almost the right direction. Try projecting an image onto a piece of card. You may need to scan the telescope from side to side until it comes into view. Using a low-power eyepiece will make this easier.
The key is to be patient and to practice!
Hazards to watch out for
When projected an image of the Sun, you must take extreme caution to ensure no one looks through the eyepiece, especially if you are observing with children. Even touching the eyepiece can be painful, as it will rapidly become extremely hot.
Also take care not to pass your hand close to the eyepiece, such that the Sun’s light is focused onto it. This can cause painful burns in an instant.
Do not leave the telescope unattended at any time. If you need to take a break, move the telescope away from the Sun. This will give the eyepiece a chance to cool off as well as ensuring no one injures themselves. It is best to leave the telescope pointing to the east of the Sun, because then you can be sure that the Sun won’t drift back into the field of view. In the northern hemisphere, this means pointing the telescope to the left of the Sun.
These hazards aside, this is much the safest way to observe the Sun with a telescope. If you’re careful, the worst that can happen is that you may lose an eyepiece if it shatters under the heat. The risks can be minimised by ensuring the aperture of the telescope is no larger than 60mm. If your telescope is larger than this, fix a piece of cardboard over the front and cut a 60mm disk out of the middle. This will reduce the amount of light entering the telescope.
Filtering the Sun’s light
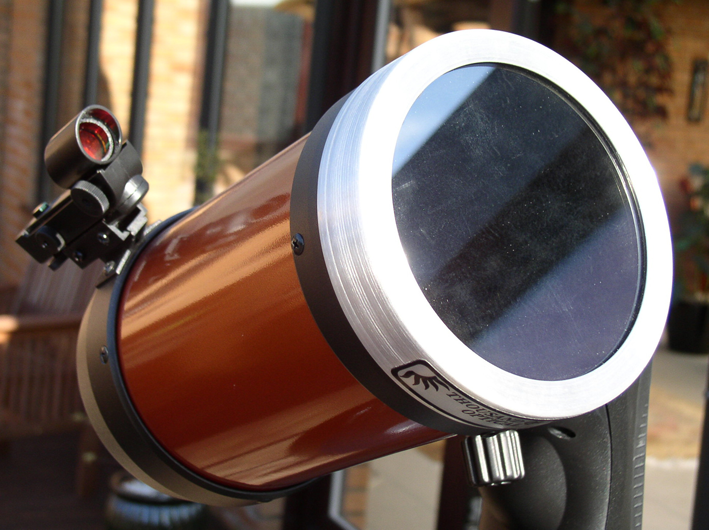
Some filters are sold which are designed to be fitted to the eyepiece end of the telescope, rather than over the front. We recommend that these should never be used under any circumstances. They are often of suspect quality, and can crack under the Sun’s heat, exposing you to the Sun’s full light.
If you make a filter yourself, the only safe option is to buy a sheet of Mylar or Baader Astro Solar Film from a reputable optical supplier, and ensure that it is fixed very securely in place. If there is the slightest scratch or pinhole, you should discard the filter and make or buy a new one.
The dos and don’ts
- DON’T ever look at the Sun without proper eye protection.
- DON’T view the Sun through sunglasses of any type (single or multiple pairs), or filters made from photographic film, or any combination of photographic filters, crossed polarisers or gelatin filters, CDs, CD-ROMs, or smoked glass. None of these are safe.
- DO view the Sun ONLY through special filters made specifically for safe solar viewing. Ensure they are DESIGNED to be fitted SECURELY to the kind of instrument you have. These include, e.g. aluminised Mylar filters, or black polymer filters, identified as suitable for direct viewing of the Sun, bearing the CE mark AND a statement that it conforms to European Community Directive 89/686/EEC. Always read and follow the manufacturer’s instructions carefully.
- DON’T fit any filter to a telescope without FIRST checking it thoroughly for damage. If it is scuffed, scratched, has pinholes in it, or you have any other doubts about it at all, DON’T use it.
- I’ll repeat that again. If you are not certain that a filter is approved and safe, or you have any other doubts, DON’T USE IT.
Further reading
For more information about safely observing the Sun, we recommend Lee Macdonald’s excellent book How to Observe the Sun Safely, published by Springer in 2012.
We are grateful to Fred Espenak for allowing us to reproduce diagrams from his website http://eclipsewise.com
More information about the circumstances of the 2016 transit can also be found
- At https://britastro.org/transit2016
- In the Notes & News Section of the 2016 April BAA Journal
- In Peter Macdonald’s paper in the 2015 October Journal
- On pages 12-13 of the Handbook of the British Astronomical Association 2016
| The British Astronomical Association supports amateur astronomers around the UK and the rest of the world. Find out more about the BAA or join us. |
