2017 August 28
An ‘off the shelf’ plastic runoff shed observatory
Background
My first BAA paper on building a runoff shed observatory appeared in the June 1983 Journal.1 That shed was erected in 1980, as a housing for my 36cm Cassegrain/Newtonian, purchased from Astronomical Equipment Ltd (the brothers Hysom) in the same year.
Nearly twenty-three years and several observatories later I decided it was time to give the trusty 36cm the same early retirement option as myself and install some hi-tech equipment on the same site and on the same concrete plinth. There were a number of reasons for this. Firstly, I was moving back permanently to the dark skies of Suffolk, where my parents live and where I had always wanted to return; this move was accelerated by the collapse of my Chelmsford employer, the Marconi company. Secondly, although I already owned a 30cm LX200 at the Suffolk site, I had experienced several motor and gearbox failures in six years of ownership. I wanted a new telescope that was totally reliable, even under heavy usage, and which could fully exploit the excellent eastern horizon which the old 36cm reflector enjoyed. Thirdly, I was twenty-three years older and having suffered at least one slipped disc, which took a year to put right, hauling my massive 36 and 49cm Newtonians around the sky, while climbing stepladders, had lost its appeal.
In addition, nights spent observing outside in the depths of winter were events that I was beginning to dread. I wanted fully robotic indoor observing when it was freezing cold outside. With the demise of my employer looking inevitable, I ordered a ParamountME mounting and Celestron 14 optics from the US company Software Bisque in March 2002. The optics arrived within ten days: the ParamountME took thirteen months!
Design considerations
Runoff sheds and runoff roofs have always appealed to me, because they are inexpensive, simple to build and, on warm nights in summer, allow the observer to see the whole sky at once (including impending cloud and bright meteors). They also do not require planning permission or invoke complaints from neighbours. For supernova patrolling (which I may indulge in) a dome would have to be automated, and for planetary observing a dome simply traps the daytime heat, ruining atmospheric seeing. Conversely, a dome is much cosier and a great protector from biting northerly winds if observing visually in the British winter. An additional consideration in my case, as a keen comet imager, is that I must be able to get as low as possible to the horizon without any observatory walls impeding the view.
The new runoff observatory for my Celestron 14/Paramount ME is actually the fifth runoff system my father and I have constructed. We had already built two wooden sheds for the original 36cm reflector (the first rotted away after about eighteen years) as well as a huge shed for the 49cm Newtonian at Chelmsford and an ultra-compact shed for the 30cm LX200.
After twenty-three years of using and building runoff sheds, experience had taught us that the new shed must be as small, rigid and lightweight as possible, and the travel up and down the rails must be flawless. The runoff sheds for the 36 and 49cm reflectors worked, but were horrendously heavy, flexed when pushed from one side of the door frame and needed annual maintenance (painting, roof repairs etc…). The much smaller LX200 shed, described in a recent Springer book,2 had been a dramatic improvement. It was so easy to roll back that I was never ‘daunted’ by the prospect of going outside. On borderline nights, when there was drifting cloud, a moon in the sky and generally poor conditions, the big shed ‘hassle factor’ was often enough subconsciously to make me stay indoors; the nightly battle with a heavy shed and a heavy telescope just tipped the balance between making the effort to go out or not. With the LX200 observatory this was never the case: I would go out for bright comets even if there were only a few gaps in the cloud. So the prime design consideration for the new observatory was that it had to be as compact, lightweight and hassle-free as possible, while still being rigid when much of the floor was missing and the door open. An essential factor in the ease with which any shed can be rolled back is whether you can push the shed back comfortably with both hands, i.e. one on each side of the door frame. This ensures an even push. If the shed door frame is more than five feet wide this is impractical (finger-tip pushing doesn’t count).
Despite the success of the compact LX200 wooden shed, it still had a few minor problems. Firstly, it had no floor at all, allowing ingress of dust, dirt and, worst of all, giant spiders. (Some of these eight-legged monsters were more than capable of walking off with a two-inch eyepiece, if you were caught off-guard.) The second problem with the LX200 shed was that it was wooden and had roofing felt. We are told in the media that certain types of weatherproof coating do ‘exactly what it says on the tin’. Sadly I have never found a tin that says ‘will protect wooden observatories for eternity, despite attack from woodpeckers and the British winter’. (If anyone sees such a tin, please let me know.) Similarly, roofing felt seems to last about four years before water breaks through the holes created by woodpeckers; and we have flocks of woodpeckers in deepest Suffolk. So for the new observatory, solutions to the dirt/spider ingress and wood/felt deterioration problems were highly desirable.
B&Q breakthrough
It was my father who spotted the B&Q Jumbo XL Shed in their ‘Garden Buildings’ catalogue, retailing for £249 including VAT. Crucially he saw that, not only was it of a plastic weatherproof construction, it had dimensions just right for a Paramount ME/C14 combination, with the door across the narrowest dimension. This latter aspect would be good for rigidity when the shed was on the move. As the UK’s prolific supernova discoverer, Mark Armstrong, had just had his ParamountME delivered, I was able to acquire the mount’s precise dimensions direct from him, confirming that the shed would be large enough when my mount eventually arrived.
 On the morning before the 2003 March BAA meeting, my father and I headed off for the nearest big B&Q warehouse at Colchester, where, we were told, these sheds were ‘in stock’. After a few minutes of confusion in the store, an assistant was eventually able to direct us to a fully assembled Jumbo XL Shed and on first sight we knew it would be up to the task. The whole construction was of lightweight, but rigid, plastic parts, which arrived in two flat-packs and were easy to assemble. It was also obvious that it was British weather and woodpecker proof and that the floor could easily be hacksawed into shape, to allow space for the large concrete plinth. The external dimensions were given as 2.0 metres long by 2.03m high by 1.45m wide. The double door dimensions were 1.3m wide by 1.9m high. When the counterweights and tube of a C14/ME system are horizontal, the length, from counterweight arm end to C14 tube outer edge, is approximately 1.4m. The C14 optical tube is approximately 0.8m long and still only a metre in length when a motor focus and CCD camera are attached. There was no doubt that the telescope would fit inside the shed, with room to spare.
Modifications to the shed
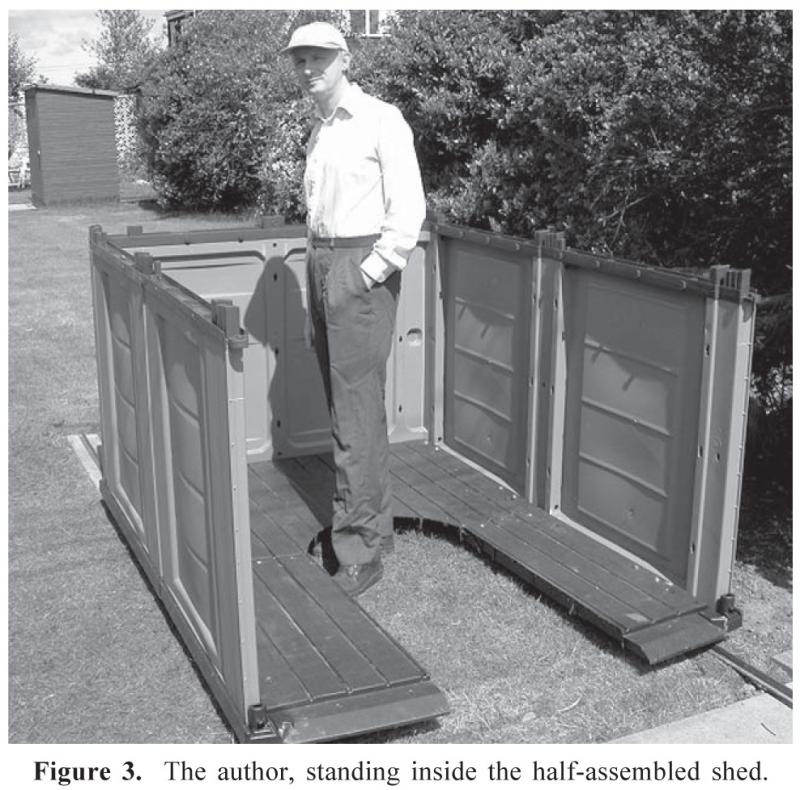
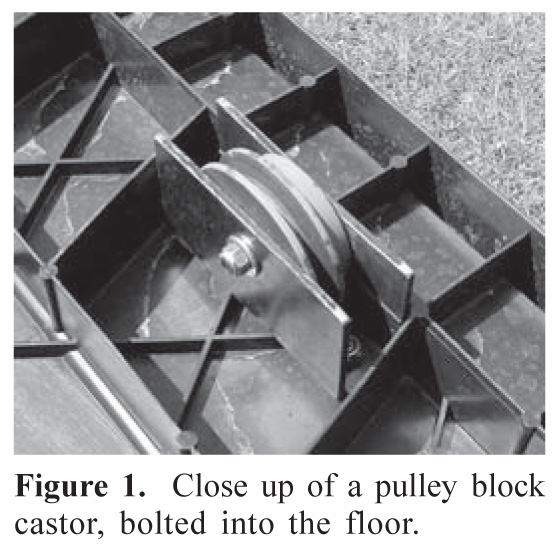
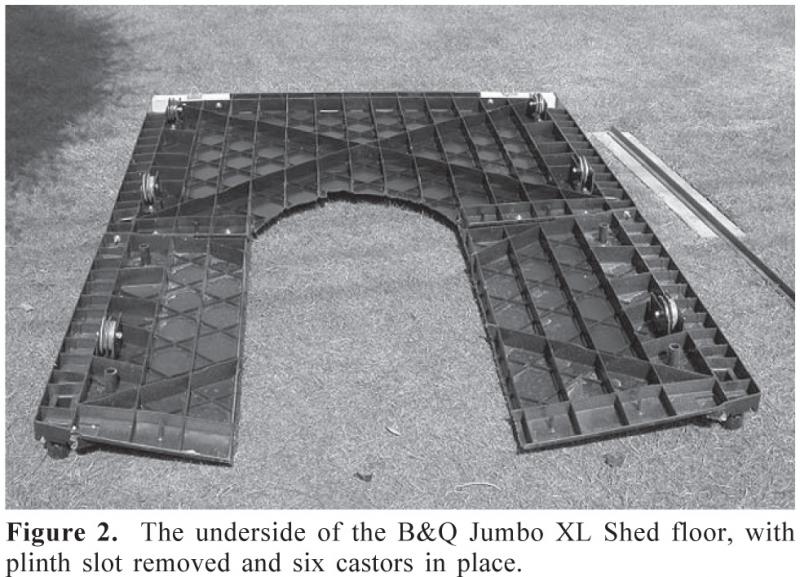
 Very few modifications were required to the shed itself. Pulley block castors from the local ironmongers, three on each side, were added to the underside of the shed floor (Figures 1 and 2), almost directly under the walls. In addition, a slot through the floor had to be cut to allow the shed to roll over the plinth. I am standing in this slot in Figure 3. As the shed floor came in the form of two equal panels, this involved cutting the door end floor panel into three parts and throwing the middle section away. Then we took the other floor panel and cut a curved recess into it where it butted up to the concrete (53cm diameter) plinth. A few extra bolts were used between the interlocking floor sections to strengthen the interfaces between the different parts of the shed floor.
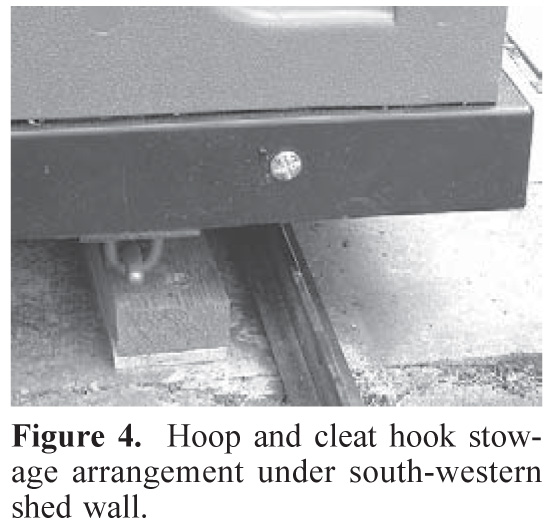
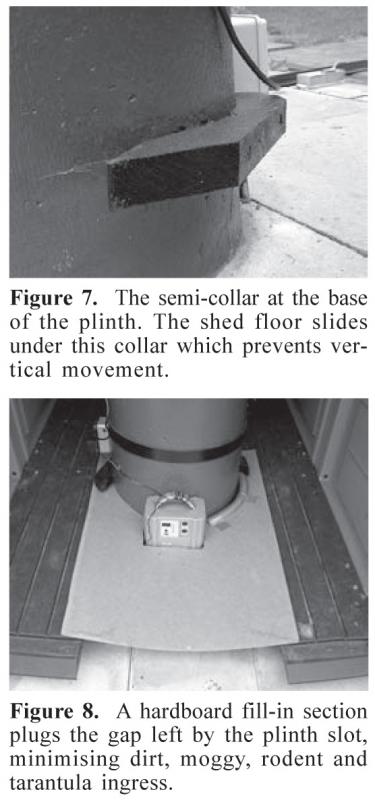
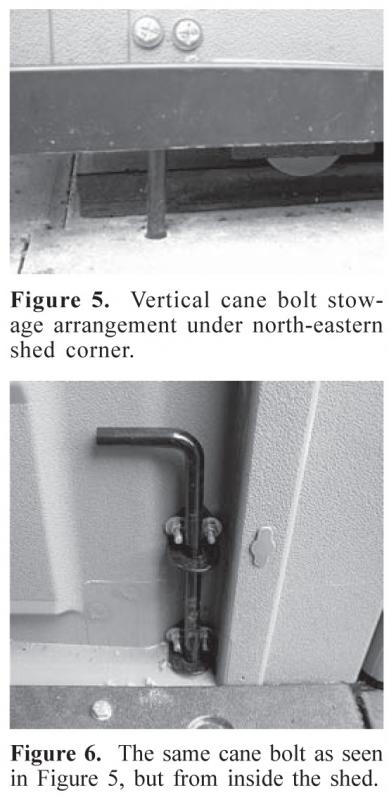 Metal hoops (known, confusingly, as plate staples) from the ironmongers were added under the west facing shed wall (Figure 4) to tie up with cleat hooks on the ground for shed storage. In addition, holes were drilled through the plastic wall sides and into the concrete slabs to enable cane bolts to sink into the ground to prevent horizontal movement when the shed was in position (Figures 5 and 6). A wooden collar surrounding the west side of the plinth, near ground level, prevents vertical movement of the shed when it is in the stowed position (Figure 7). This collar was screwed into the plinth with wall plugs. The plastic shed floor, where it butts up to the plinth, slides under this collar, a few millimetres below it. Extra security features, locks and alarms have now also been built into the shed but, for obvious reasons, I would rather avoid any description of these.
The rail
 The two (six metre long) rails were salvaged from the old 36cm reflector shed. These were acquired, many years ago, from a scrap metal dealer and have an inverted ‘T’ profile enabling the rails to be screwed easily down to any concrete base. To minimise disruption to the garden, the western ends of the rails are simply screwed, with wall plugs, into unobtrusive narrow concrete slabs inlaid into the lawn. At the eastern end, the rails are screwed at various points into identical slabs, within the paved area surrounding the plinth. Wooden ‘buffers’ on the rails at the extreme western end prevent the shed being pushed off the rails by accident. The rails were initially laid with the minimum of screws until the shed was fully assembled. Then, with the complete shed assembled (a process taking a few hours only) the free-running of the shed was assessed and the rail separation fine-tuned until the shed literally glided along. New holes were then drilled into the slabs for the southernmost rail (which was adjusted by a centimetre or so) and all the rail screws were secured firmly in position. It is imperative that the rails are secured level and parallel; this may involve quite a bit of soil excavation and fiddling, but will pay dividends when the shed is in nightly use.
Completing the system
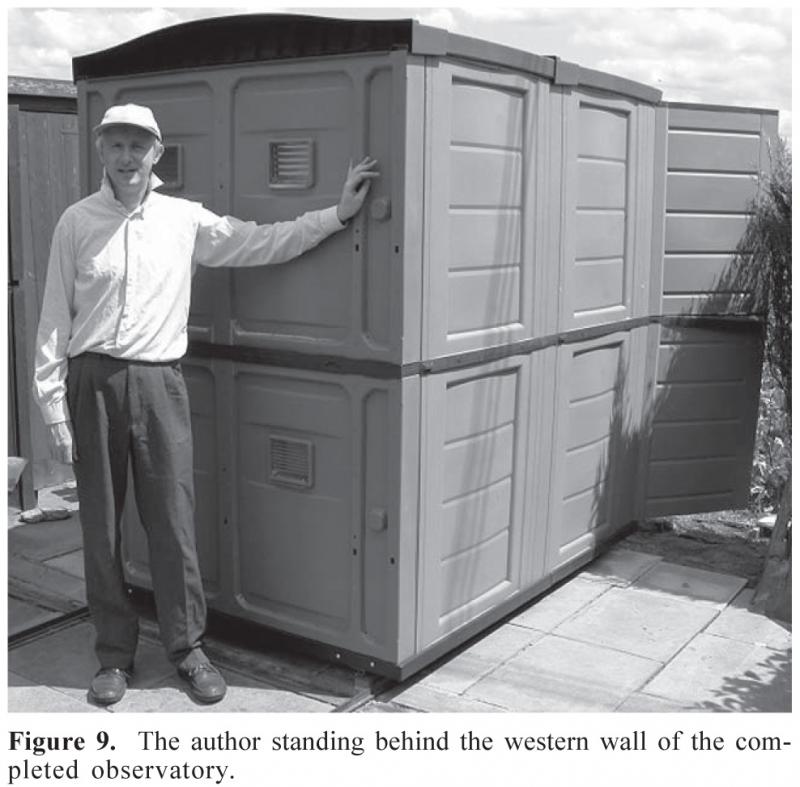
Once the shed was in place and acting as a weatherproof cover, a section of hardboard was used to fill the gap in the floor around the east side of the plinth (Figure 8). This has worked remarkably well in preventing the ingress of dirt, dust and insects. No giant spiders have yet been spotted inside the shed, although one snail did sneak in (precisely how is still a mystery). Figure 9 shows the author standing behind the shed when it is rolled over the telescope.
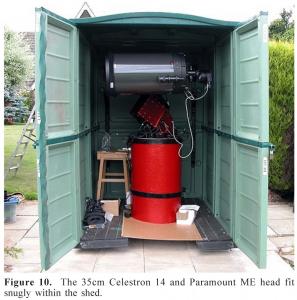
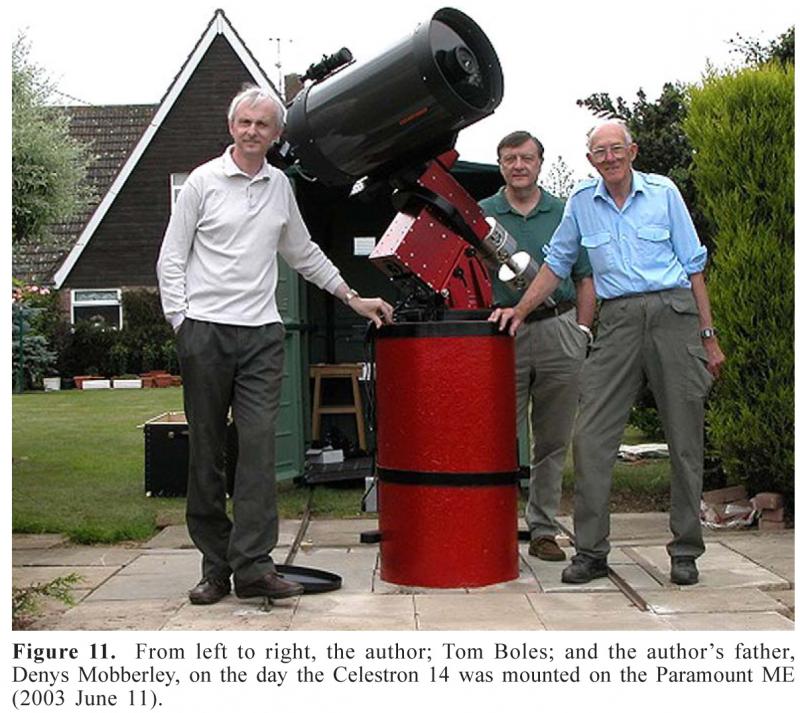
 The final operation was assembling the telescope on the plinth. To interface the ParamountME to our plinth, a ‘Heavy Duty’ baseplate had been purchased from Software Bisque, manufacturers of the ME mount. This ME baseplate has a series of holes pre-drilled through it, and corresponding holes had to be drilled and tapped into the existing metal plate, originally supplied twenty-three years earlier by Rob Hysom of AE. The plinth itself consists of two interlocking concrete drainage pipes, one metre long by 53cm diameter. One is underground; the other sits on top of it and is visible in the pictures. Over a ton of concrete was used in 1980 in the construction of the plinth. The new system is much lighter than the old 36cm reflector however, and so was easy to mount on the overly massive plinth. The ME head only weighs thirty kilograms, so is easy for two adults to manhandle. The C14 optics weigh in at a mere eighteen kg and so, even with twenty-seven kg of counterweights on the Dec axis, the whole system weighs seventy-five kg: less than half the weight of its predecessor. The Celestron 14 on the ME head, viewed from the east, with the shed in place, is shown in Figure 10. Tom Boles, who lives twenty miles away, kindly offered his expertise when we mounted the optics and powered the system up (Figure 11), but almost every other part of the observatory construction was completed with a two-man workforce. The local firm of Graham Parish Engineering generously donated their tools and staff (the managing director himself) when the plinth plate holes were being tapped to take the ME baseplate.
Cabling
As the ParamountME is designed for remote operation, it is essential to have reliable communications between control room and observatory. Specifically, three data cables were required to run, in a flexible conduit hose, under the lawn: the PC USB port to CCD camera cable, the PC Serial port to ParamountME (TheSky software) cable, and the focuser control cable.
 We will deal with these in sequence. The SBIG ST9XE CCD camera has a very fast download time of under a second because of its USB operation; this is incredibly useful when focusing. However, USB signals are only guaranteed over a maximum cable length of five metres and, in my case, telescope and indoor control room are over 30 metres apart. SBIG recommend the Icron range of USB extenders for increasing the range of USB operation. These extenders consist of two boxes, one at the PC end and one at the USB device end. A user-supplied category 5 cable (or equivalent) joins the two. The UK Icron dealers are Scene Double Ltd of Borehamwood, whose web pages are at www.scene-double.co.uk.
I purchased the Icron USB Ranger 410i from Scene Double. This unit has four output ports at the device end (in case you wish to control multiple devices in the observatory) and has worked reliably with the ST9XE camera. I was a bit concerned as to whether Paramount ME RS232 communications would work over the 30m distance to the observatory, using a standard RS232 cable (despite the relatively slow 9600 baud data rate). I need not have worried: it works perfectly when controlling the ME mount from TheSky.
 The final cable goes to the JMI ‘NGFS’ motorised focuser unit. Here I have two options. I purchased a digital read out, hand unit and serial port controller for this focuser. With a category 5 cable running to the observatory and a spare RS232 cable I can focus from the PC serial port or by having the JMI focuser handset indoors. Both options work. One potential snag with serial control is that modern PCs often have a host of USB ports spare, but only one serial port. You can purchase USB to serial port converters if you wish to run both the ME mounting and the focuser from the same modern PC, but Software Bisque advise caution here. Specifically they state that ‘inexpensive brands of USB to Serial converters may not communicate reliably with the ParamountME’. So if you do want to use two PC serial ports and one is actually a USB to serial converter, use that one for the focuser control, not the ME control, which is far less risky. Alternatively, just use the JMI handset with a 30m category 5 cable; it works perfectly. All the cables used, as well as the flexible cable conduit, were purchased from Maplin Electronics.
In truth, there is a fourth cable going down the garden: the mains cable supplying observatory power from the house. Taking full advantage of this, a mains comms walkie-talkie system for communication between house and observatory has proved invaluable when initially powering the telescope up each night.
Finally… a dew cap and a colour scheme
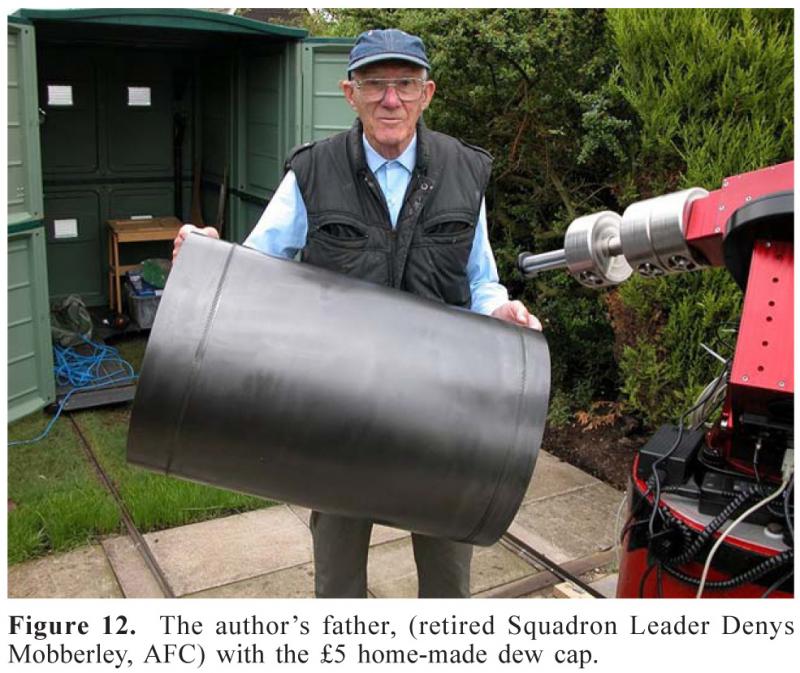 Any Schmidt-Cassegrain observer with a runoff system soon learns that, without a dew heater and a dew cap, an SCT corrector plate will dew over (or freeze over) in minutes in the British climate. For a remote system, effective dew prevention is essential; there is little point making a telescope remotely controllable if you keep having to leave the house with a hairdryer. I purchased a dew heater band and controller from Broadhurst Clarkson & Fuller (BC&F), but they could not supply an inhouse dew cap for a C14 at that time. I searched around on the Internet and was horrified at the prices of dew caps. Anything from $150 to $300 was being charged for what was, essentially, a curved piece of plastic or aluminium. Fortunately my father, once again journeying through B&Q, spotted a flexible plastic offcut on sale for £5. After a few experiments adjusting hose clamps around the circumference, to refine the interface with the 40cm external diameter C14 tube (i.e. make it a friction fit) the diameter was fixed (with a few nuts and bolts) and the £5 dew cap was completed. My father, with his creation, is shown in Figure 12. A can of matt black paint was used to reduce reflections on the inside of the dew cap; an old can of paint, used to touch-up my original metallic grey Ford Granada, came in useful when matching the dew cap exterior to the C14 tube colour. Coincidentally, the metallic red colour of my mother’s Renault Clio is identical to that of the ParamountME, so a can of Renault spray paint was used to colour coordinate the plinth to the mounting.
The telescope is now in regular use and I hope it proves as productive as its predecessor, which stood on the same plinth for almost twenty-three years, as the main instrument at IAU station 480.
Acknowledgments
I am indebted to my father, Denys Mobberley, for his help in all my telescope and observatory projects over the past thirty years. Thanks are also due to Mark Armstrong and Tom Boles for sharing their knowledge of the Celestron 14/Paramount ME hardware and associated software. Thanks also to Graham Parish for help in drilling and tapping the plinth baseplate, and Nigel Adams (next-door neighbour) for help in dismantling the old and massive AE reflector.
References
1 Mobberley M. P., ‘A Runoff Shed Observatory’, J. Brit. Astron. Assoc., 93(4), 156-159 (1983)
2 Mobberley M. P., ‘A User-Friendly Runoff Shed for a 12-inch LX200’, More Small Astronomical Observatories, Springer-Verlag, 2002, pp 29-40
Article originally published in the JBAA 114, 2, 2004
Readers may be interested to explore the BAA’s Instruments & Imaging Section which has many articles about observatories that have been built by members or otherwise, or to look at pictures BAA members have uploaded to the BAA Members Pages about observatories and associated items
| The British Astronomical Association supports amateur astronomers around the UK and the rest of the world. Find out more about the BAA or join us. |
