2017 January 9
Binoculars for the travelling astronomer
Many observers these days are taking advantage of the availability of cheap flights to travel to far flung countries to observe, frequently combining astronomy with a family holiday. Although these flights have never been cheaper or available to more destinations, they usually come with baggage restrictions and severe financial penalties for exceeding them. Binoculars are an ideal solution for the weight-conscious traveller, as they can be used for other activities such as bird watching, in addition to astronomy.
Of course it is necessary to realise the limitations of binoculars. While they may give superb views of the Milky Way, large bright nebulae, bright comets such as Hyakutake and Hale-Bopp which graced our skies in the 1990s and many of the brighter variable stars, they will not show fine planetary detail. They are of course available in many sizes, some rivalling large telescopes, but this article considers the smaller or what may be regarded as traditional binoculars, suitable for hand holding.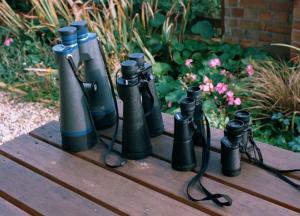
Choosing binoculars – size and type
Binoculars are defined by two numbers, such as 10×50 or 20×80. The first indicates the magnification, and the second the aperture of the objective lens in millimetres. The smallest binoculars suitable for astronomy are probably 8×30 while the largest that can be comfortably hand-held for long periods would be around 15×70, although clearly this would depend on the person doing the holding and the weight of the binoculars. If they can be supported in some way then larger binoculars such as 20x80s could be used, and techniques for doing this will be discussed in later.
As with most things in life choosing binoculars is frequently a compromise. While 8×30 binoculars will typically have a field of view of around 8°, 15x40s will have a field probably half that but gather much more light because of their larger aperture. Typical fields of view for different size binoculars are given in the table.
Usually the field of view is given in degrees and written on the binoculars alongside their size. Occasionally, and in particular with older instruments, the field may be quoted in terms of width of field in feet at a distance of 1,000 yards. Whilst this may be meaningful for terrestrial use it is meaningless for astronomy. To convert these units into the more sensible degrees, divide the feet figure by 52.5. For example, if the field is written as 367 feet at 1,000 yards, then dividing 367 by 52.5 gives a field of 7°. If the units are in metres instead of feet and yards then divide the width figure by 17. For example 120m at 1,000m equates again to 7°.
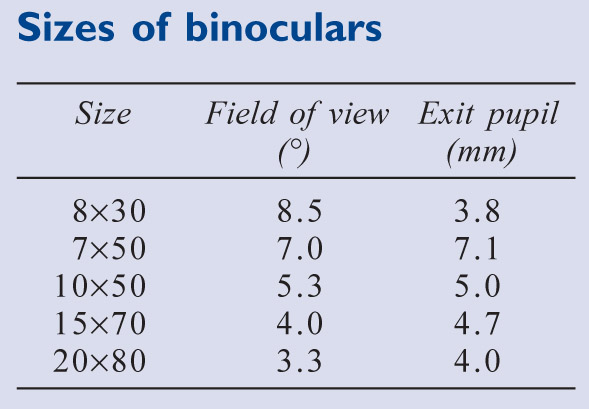
The column in the table labelled ‘exit pupil’ refers to the diameter of the image formed by the eyepiece. It is obtained by dividing the aperture of the binoculars in mm by their magnification. For optimum performance and to ensure that all of the captured light enters the observer’s eyes, the exit pupil of the binoculars should be smaller than your fully dark-adapted eye pupils. As you age your pupils dilate less, and while the pupils of someone in their twenties may increase to over 7mm, those of someone in the sixties may struggle to reach 5mm and for people in their seventies it can reduce to 3mm. Therefore an elderly person using a pair of 7×50 binoculars will almost certainly not be making full use of them as much of the light will be wasted. Another aspect that should be considered is the quality of your skies and surrounding environment. Although your pupils may dilate to 7mm in perfect darkness, in practice this rarely happens as most sites suffer from some light pollution.
Because binoculars are intended for general observing, they are designed to give a correct view (i.e. top at the top and bottom at the bottom) rather than the inverted view given by many astronomical telescopes. This is achieved by using prisms in the optical train. There are two main types: porro prisms and roof prisms. While roof prism instruments look rather like two small telescopes fitted together in parallel, porro prism types have an off-set in them so that the eyepieces are closer together than the objectives. Most very small binoculars are of the roof prism type as this gives a very compact design. However for astronomy, where light is often at a premium, the porro type is recommended as the arrangement gives total internal reflection and so minimal loss of light. This is not to say that there are not many excellent roof prism binoculars in the market, but good quality roof prism designs tend to be expensive and cheaper models usually give poor images, certainly on astronomical objects. Also, because of their design layout, roof prism instruments are not usually available in larger apertures.
In addition to the prism type, another consideration is the prism material. Usually this is printed on the binoculars alongside the size and field of view. Look for BaK-4 prisms rather than BK-7, which are often used in cheaper binoculars. BK-7 prisms give poorer light transmission and so a less bright field. Nearly all binoculars nowadays will have fully coated optics to reduce internal reflections and increase light transmission and contrast: again this will usually be written on the body. Avoid those that just say ‘coated optics’ as often this means that only the outer surfaces have been coated, rather than both outer and inner.
Many spectacle wearers will be able to remove their glasses and use the focus control on the binoculars to correct their vision (although you may want to wear your glasses so you can refer to star maps or charts). However for people suffering from astigmatism this is not really an option and it will be necessary to ascertain that the eye relief of the binoculars is sufficient that focus can still be achieved with spectacles on. Many binoculars are designed to have long eye relief for this purpose and, in addition, the vast majority will have rubber eye cups that can be folded back if necessary to allow the eyes to be brought closer to the eyepieces.
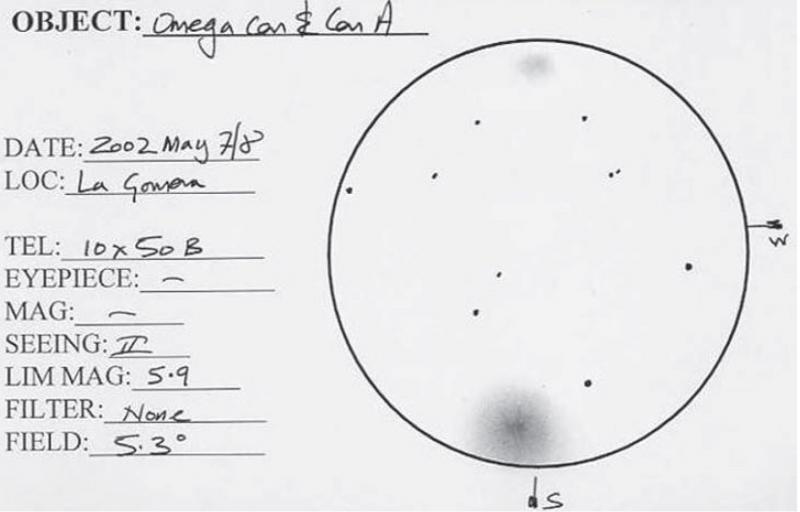
Common sense might suggest that the larger the aperture the more detail will be seen but this is not necessarily true. Recently a new term has entered the vocabulary: Visibility Factor (see Sky & Telescope, 1995 May). This term, coined by Roy Bishop, editor of the Observer’s Handbook of the Royal Astronomical Society of Canada (RASC), is obtained by multiplying aperture by magnification and determines how binoculars perform under typical light polluted skies. Using this term it can be seen that, according to Bishop, a pair of 10x40s (VF=400) would perform better than a pair of 7x50s (VF=350).
Using binoculars
Before you start observing you will first need to focus the binoculars. Any pair worthy of the name will have a central focus control that adjusts both eyepieces, combined with a fine focus on one barrel to ‘tune’ the focus for that eye. Firstly focus the binoculars so that the eye on the side away from the fine control is in sharp focus and then use the fine control to focus the other eye. When carrying out this procedure do not close the opposite eye to the one you are focusing as this can change the focus of the open eye, but instead use the lens cap to block off the light from that side.
Whatever binoculars you have, how you use them will ultimately determine what you can see with them. While any pair, even a heavy pair of 20x80s, can be hand held for a ‘quick look’ at something of interest, even a pair of 8x30s will benefit from being firmly supported. I give many talks on instruments at BAA Back to Basics courses and always say that I would much rather use an optically less than perfect telescope on a stable mount than an excellent optical tube on a flimsy mount: the same principle is true with binoculars – what you will see will largely depend on how firmly the binoculars are held. A trawl through the internet will show many wonderful binocular mounts often involving parallelogram supports fitted to adjustable chairs. While these may well be the ultimate luxury observing seat, they are unfortunately no use to the traveller trying to cram clothes and observing instruments into a 10kg package.
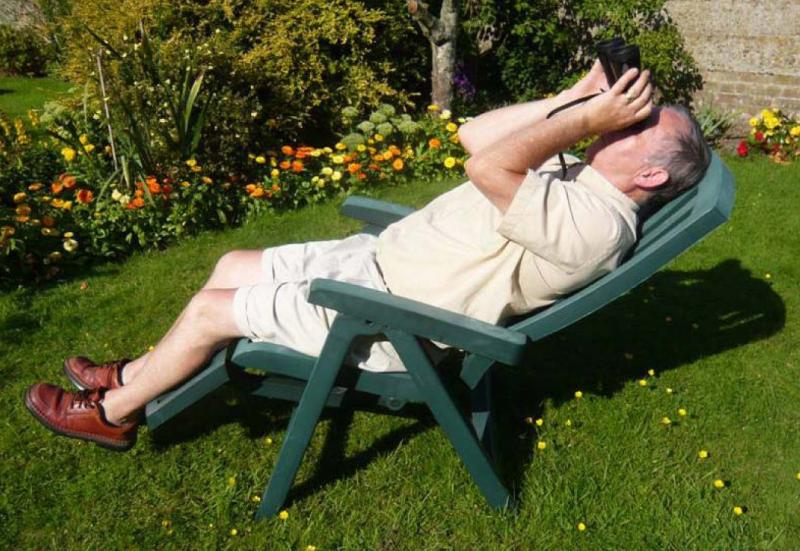
Many people hold binoculars roughly halfway along their length. If instead you hold them close to the objective end you will find you can hold them much steadier and control them better. There is no doubt that being seated rather than standing leads to much better control, as you can tuck your arms firmly into your rib cage and form a kind of tripod structure with your body. If as a travelling astronomer you are staying at a hotel complex with a pool, it will almost certainly have adjustable sun loungers. These make ideal observing chairs if you can move them to an unlit area of the site. In one small hotel in Greece I was even allowed to put the lounger in a hire car and drive to a dark site. Another switched the lights off for me at midnight – it is always worth asking.
Many larger sized binoculars are fitted with a threaded bush between the barrels to allow them to be fitted to a camera tripod. While this is fine for looking straight ahead and perhaps a few degrees up from the horizon, it is no good if you want to look close to the zenith. Even if you can get the binoculars at some sort of steep angle, it will prove impossible to look through them for more than a few seconds without ruining your neck for the rest of the holiday. In addition, any tripod that collapses small enough to fit in your luggage will not be sturdy enough for serious binocular observing.
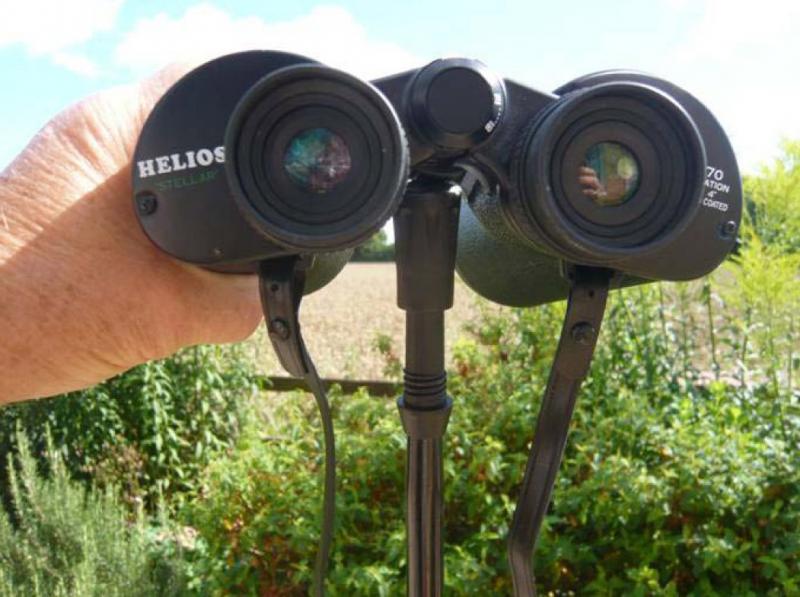
Many photographers now use camera poles to steady their cameras, often quicker and easier to use than a tripod, although of course not self-supporting. The same poles can be used with binoculars although an alternative support can be made with a walking pole. This has the added advantage that it can also be used for its original purpose if necessary. Most smaller binoculars are not fitted with a threaded tripod hole, but the handle of a walking pole can easily be jammed between the barrels forming a very firm support. Of course the same restrictions apply to a pole as to a tripod, and they are not suitable for observing close to the zenith, but they provide a very firm support for observing at low altitude from a chair. If you do not have a pole you will have to improvise yet further. Almost any form of support can be used, from a fence or wall to a gate post or even the roof of a car. The benefits to be gained from firmly supporting binoculars compared to just hand-holding them cannot be over estimated.
The ultimate steady observing experience is probably achieved by using image stabilized binoculars, and most people who have them would never return to conventional models. However, they do have some limitations. They are expensive, they are not readily available in larger sizes and they tend to be heavy, certainly compared to conventional binoculars, so hand-holding can be tiring if you are planning a long observing session. However, if you get an opportunity to look through some you will be amazed at how the image freezes when you press the stabilize button. Certainly this technology looks likely to be the way forward for future binocular observing.
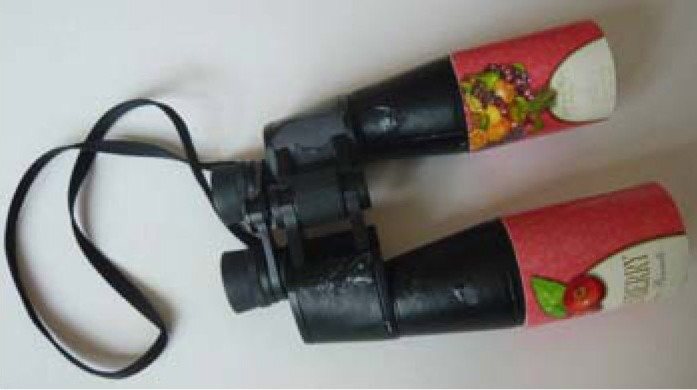
Whatever binoculars you use, if you are out under the sky for any length of time, particularly in the UK or northern Europe, you are likely to suffer from the perennial problem of dewing. Binoculars are particularly prone to this because of the lack of barrel extension beyond the objective lenses. A simple solution is to make dew shields from suitable sized cardboard tubes. Many foods, particularly fancy biscuits, are packaged in stiff cardboard tubes that are ideal for this purpose, although expect some strange looks from shop staff as you survey the range of biscuits on display with a ruler in your hand. You will probably need to spray the inside of your home-made dew shields with matt black paint (blackboard paint is ideal) to avoid stray reflections.
With their wide field of view, binoculars are the ideal instrument for scanning the Milky Way star fields for clusters and nebulosity. Nebula filters work wonders on emission nebulae and with a little ingenuity can be fitted to binoculars. The standard 1¼ inch filter size can often be pushed in to the rubber eye cups on binoculars, although care will be needed to ensure that you don’t scratch or otherwise damage the filter surface by holding it too close to your eyes (it is also only too easy for the filter to pop out and land in a patch of wet grass or on a hard concrete floor, so great care is essential). UHC filters, rather than the narrower band OIII, are ideal for experiments of this sort. It is not necessary to have a filter for each eyepiece as with just one filter fitted and closing each eye in turn (yes, I know I said earlier that this will slightly change the focus of the open eye, but we are experimenting here) you can compare filtered and unfiltered views. Remember that nebula filters only work on emission objects, such as the Veil and North American Nebula; they will not help you see the reflection nebulosity surrounding the Pleiades, for example.
Over the years I have owned and used numerous telescopes but there is something very special about the wide field of view that binoculars give, particularly under a really good dark sky. Some of my most memorable observing experiences have been teasing out clusters and nebulae in a pair of 15×70 binoculars while lying back in a comfortable chair. With binoculars, a planisphere and a simple pocket constellation guide such as Collins’ Gem Night Sky, a good time is almost guaranteed. Provided of course the clouds keep away.
Stewart L. Moore
Stewart is a former Director of the BAA Deep Sky Section. He is a keen visual observer who prefers using a pencil and paper to a CCD and computer.
Article originally published in the JBAA 122, 1, 2012
| The British Astronomical Association supports amateur astronomers around the UK and the rest of the world. Find out more about the BAA or join us. |
