2018 April 28
Observer’s Challenge – Imaging Jupiter


With small telescopes it possible to following the major atmospheric features and the planets four bright Galilean moons. Even with modest apertures you will clearly see they vary in brightness from each other. With telescopes of 15cm (6”) or more you will notice the different colours they display as well their tiny disks when seeing allows. Large aperture telescopes can reveal details on these moons, especially Ganymede.

The famous Great Red Spot is especially prominent this year and displays a deep orange colour – the most deeply coloured it has appeared in many years. Small telescopes of 7.5cm (3”) or more should reveal it easily under steady atmospheric conditions, while larger telescope will clearly show its striking deep colour.
The most popular cameras in use today are the various types of high speed video CCD cameras such as those from ASI, though excellent lower cost alternatives are available such as the Phillips Toucam and SPC900 which can be obtained second hand fairly easily for around £50 or so. Using such cameras it’s possible to take detailed images even with modest size telescopes. Either a colour camera can be used to produce colour images, or one can use a mono camera and use different filters to bring out different details on the Planet. For those starting out a colour camera is recommended as this is by far the easiest way to start getting nice colour images of the planet.

Imaging Jupiter with any telescope is a fairly straightforward process. The telescope focal length needs to be increased to give a good size image on the camera chip. Around F/20 to F/30 is a good point to aim for. Due to Jupiter’s rapid rotation you are limited to a maximum capture time of only a couple of minutes within which to obtain as many frames as you can.
Collimation and focusing are very important for any telescope to perform well so be sure to take some time over these steps. A motorised focuser would be a great addition to your telescope if you don’t already have one. Another very useful accessory to invest in is an atmospheric dispersion corrector. This device corrects the smearing out of light due to the low altitude of an object in the sky. With Jupiter now barely reaching 25º altitude from the UK one of these will be essential especially for larger telescopes operating with colour cameras.
. [D.Peach]")
Free software is widely available for both controlling the camera and processing the imagery obtained. Firecapture is the most popular camera control software and is freely available for download. Registax and Autostakkert are the most popular software packages available for the task and both are available for free download online. They offer a wide range of different processing functions from image alignment to wavelet sharpening functions. Autostakkert 3 is the best program for image alignment and stacking, while Registax is a great post processing package for sharpening your images. When processing your data be sure to use a good amount of frames to stack to help reduce noise – at least several hundred frames will be needed. Also be careful not to sharpen the image too aggressively as this can lead to false detail being created.
There British Astronomical Association (BAA) Jupiter section has a very active program and I greatly encourage observers to submit their images for further study. Also consider submitting your imaging to the Juno mission website.
There are also several active groups of professionals/amateur astronomers on social media. The Facebook group “Astronomy Planetary Imaging” contains many experienced observers and scientists.
Firecapture: http://www.firecapture.de/
Autostakkert 3: http://www.autostakkert.com/
Registax: http://www.astronomie.be/registax/
British Astronomical Association Jupiter Section https://britastro.org/section_front/15
Association of Lunar and Planetary Observers (ALPO): http://alpo-astronomy.org/
Association of Lunar & Planetary Observers Japan: http://alpo-j.asahikawa-med.ac.jp/indexE.htm
Juno Mission: https://www.missionjuno.swri.edu/
Damian Peach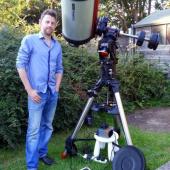
Website: http://www.damianpeach.com/
[Thumbnail image: Jupiter, March 31st 2018, D. Peach / Chilescope team]
| The British Astronomical Association supports amateur astronomers around the UK and the rest of the world. Find out more about the BAA or join us. |