2018 February 10
Finding the way – part 1
An earlier article discussed how the motions of the Earth change the appearance of the sky hour by hour, night by night and season by season. Another tutorial introduced the concepts of constellations and star names.
This article, the first part of two, will bring this all together to show how to discover which stars and constellations are visible at any given time. The second part takes what we have learnt here outside, to locate and identify the actual constellations in the sky.
What’s in the sky now?
There are three things that determine which stars are visible in the sky at any given time: the date, the time and your position on the surface of the Earth. There are a number of high-tech and low-tech means to determine what is in the sky above you and what follows is a brief guide to using them.
1). Planisphere
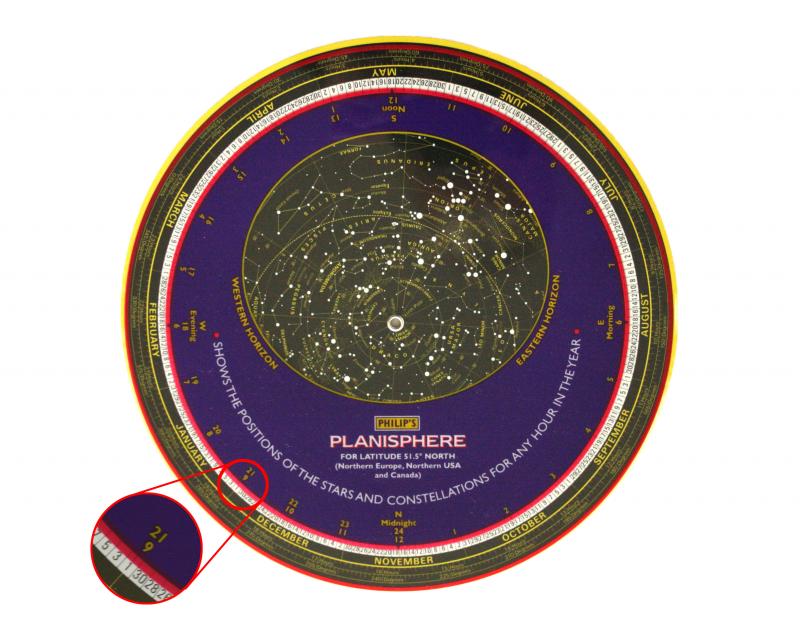
A planisphere is a very simple low-tech solution that has been around for many years. It consists of two plastic disks that rotate about each other on a pivot centred on the celestial pole. The lower disk contains a map showing all the stars which are visible from a given latitude throughout the year.

The planisphere is very easy to use. Simply align the date on the bottom disk with the time on the upper disk and the transparent oval window will show the stars as they appear at that date/time combination. If you then hold the planisphere above your head with the 24 hr mark pointing due north it will show you where each constellation is at that time.
The advantages of the planisphere:-
-
Low cost (typically under £10).
-
Easy to use.
-
Reasonably robust, you can drop it in the long grass and stand on it and it should not come to much harm.
-
Impervious to damp and cold.
-
No batteries to go flat.
The disadvantages are:-
-
It is only correct for a single latitude. In practice it will work quite successfully for up to ten degrees either side of the designated latitude.
-
You cannot zoom in see more detail or fainter stars.
-
Some can be used to also locate the planets, but it isn’t straightforward.
-
Need to illuminate it with something, and you will need reading glasses if you wear them.
Despite having been interested in astronomy for nearly fifty years I still have a planisphere and use it. It is particularly useful to ‘look ahead’ and plan observations especially at unusual times such as the wee small hours. Suppose there is a comet in Orion, rising before the dawn, using the planisphere I can quickly see when Orion rises and at what time it reaches a decent height above the horizon, thereby giving me an idea when best to observe the comet.
The BAA shop sells planispheres should you wish to buy one. Personally I consider one a good investment.
2). Software packages
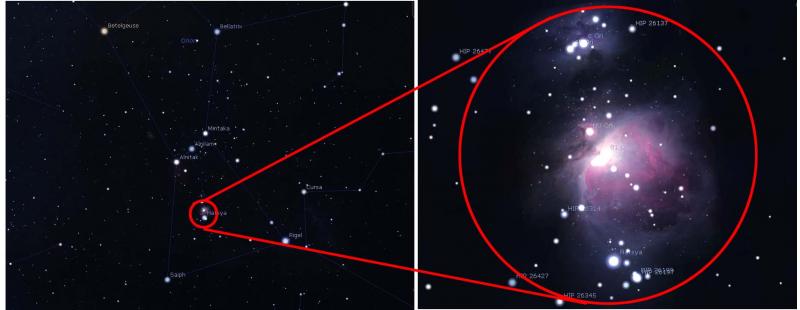
There are many different software packages for computers, tablets and smart phones that will display the sky at any particular time and for any particular location; these are often known as planetarium software and apps. They range from freeware to some packages which can be truly expensive. The screenshots in figure 2 are taken from Stellarium, which is free and is perhaps a good starting point although the interface can be a bit daunting for the beginner.
If you intend to use planetarium software in the field you are going to need a laptop or handheld device (smart phone or tablet) to take outside. If you use the software on a desktop indoors you can always print out star maps to take these outside but this does lose you some flexibility.
Any decent star charting software should allow you to zoom in and out; show stars well beyond naked eye visibility, planetary positions and ideally new discoveries such as comets or at least have the facility to add them manually.

One big advantage of a tablet or smart phone is that the software should be able to use the device’s position sensors to know where it is pointed. This means you can aim the device at a particular area of the sky and the display will mimic what is in front of you. Conversely you can tell the app what you want to find and an arrow on the screen will guide you in the correct direction.
One important point, if using a smartphone or tablet in a case with a magnetic fastening, it is a good idea to remove the phone from the case. The magnet can play havoc with the sensors and the phone may display an entirely different part of the sky or even the ground! It is sometimes necessary to ‘calibrate’ the device’s sensors by moving it slowly in a horizontal figure of eight.
As well as software installed on a computer or mobile device there are also online planetarium packages such as In The Sky.
Whatever you use, make sure that the software is set up to show the constellations as stick figures. If it defaults to the ‘classical’ mythological figures you will definitely be confused. See figure 3A and 3B.
The advantages of planetarium software:-
-
Flexibility, works for all latitudes.
-
Can be easy to use depending on design.
-
If using a mobile device it knows where it is pointing.
-
Can show many faint objects.
-
Planetary positions.
-
Can include new discoveries such as comets.
-
Zoom in and out to different scales.
-
Background information on specific objects.
-
Ability to print out charts if using a computer more restricted on a mobile device.
The disadvantages are:-
-
Can be expensive.
-
The more fully featured packages can be quite complex for the beginner.
-
To use it outside you will need an electronic device, which in itself may not be available or practical.
-
Small screen size if using a smartphone.
-
May have issues with damp and cold. As ever when using electrical equipment in potentially damp conditions safety is paramount.
-
Battery lifetime on the electronic device.
3). Astronomy magazines and books
Most popular astronomy magazines have a centrefold chart showing a naked eye stars and other celestial bodies for a given date/time/latitude combination. There are also a number of books published annually giving a month by month guide to the night sky with star charts. An Internet search will find several; the BAA shop sells the Stargazers Almanac.
Generally they will have the current positions of the planets and maybe some comments on what is on show at the time.
The advantages of magazine and book charts:-
-
Easy to use.
-
Can be comparatively cheap.
-
May have guides as to what is on the chart.
-
No batteries to go flat.
-
Other articles in the magazine or book.
The disadvantages are:-
-
It is only correct for a single latitude but in practice it will work quite successfully for up to ten degrees either side of the designated latitude.
-
If using a magazine it only works for a given set of date and time combinations, e.g. if you wanted to know what is in the sky at 3am you would need a magazine from some months earlier to get the correct map.
-
You cannot zoom in to lower levels of detail or see fainter stars.
-
May have issues with the damp conditions outside.
-
Need something to illuminate the chart with
Conclusion
You may be wondering which method I use myself. The answer is all of the above except magazines and books. The planisphere is great for a quick check on what the sky will look like at some point. I use a couple of packages on the computer to delve into fainter objects and print star charts. A smartphone app is useful for foreign holidays under strange skies and also gives me the altitude and azimuth of objects in the sky if I want to use them to aim my telescope.
So we can now find out what should be in the sky, the next part of this article will move from theory to practice and cover using the charts out side in order to find the actual constellations in the sky itself.
| The British Astronomical Association supports amateur astronomers around the UK and the rest of the world. Find out more about the BAA or join us. |
